AWS Multi-Account setup for AWS Organizations
Overview
This guide provides an overview of the process for setting up the AWS Integration with multiple accounts within an AWS Organization.
The CloudFormation StackSet template provided by Upwind automates the creation of the required IAM role and associated policies in every AWS account under an Organization or Organizational Unit (OU), and configures the accounts within Upwind, eliminating the need for manual setup. Once set up, the integration automatically starts collecting and monitoring your infrastructure.
The Upwind CloudFormation StackSet performs the following steps:
- Deploys the AWS CloudFormation Stack in every account under an AWS Organization or Organizational Unit.
- Automatically creates the necessary IAM role and policies in the target accounts.
Prerequisites
- Access to the management account: Your AWS user needs to be able to access the AWS management account.
- An account administrator has enabled Trusted Access with AWS Organizations: Refer to Enable trusted access with AWS Organizations to enable trusted access between StackSets and Organizations, to create and deploy stacks using service-managed permissions.
Setup
Cloud account credentials
Click on the "Generate" button to generate a new Upwind client id and secret. The client id and secret will be used to create an AWS secret in the AWS account.
If you have already created an AWS Secret with Upwind's client ID and secret, you can click the "Upwind Client Credentials ARN" button and enter the ARN of the secret. If you haven't, you can generate a new secret by clicking the "generate a new one" button.
Login to Administator Account
In the multi account deployment method, you need to login to the AWS account that is the administrator account of the AWS Organization.
Run CloudFormation StackSet Template
- Go to AWS StackSet creation page: Cloudformation -> Stacksets
- Select Template is ready
- Select "Amazon S3 URL" and enter the following URL:
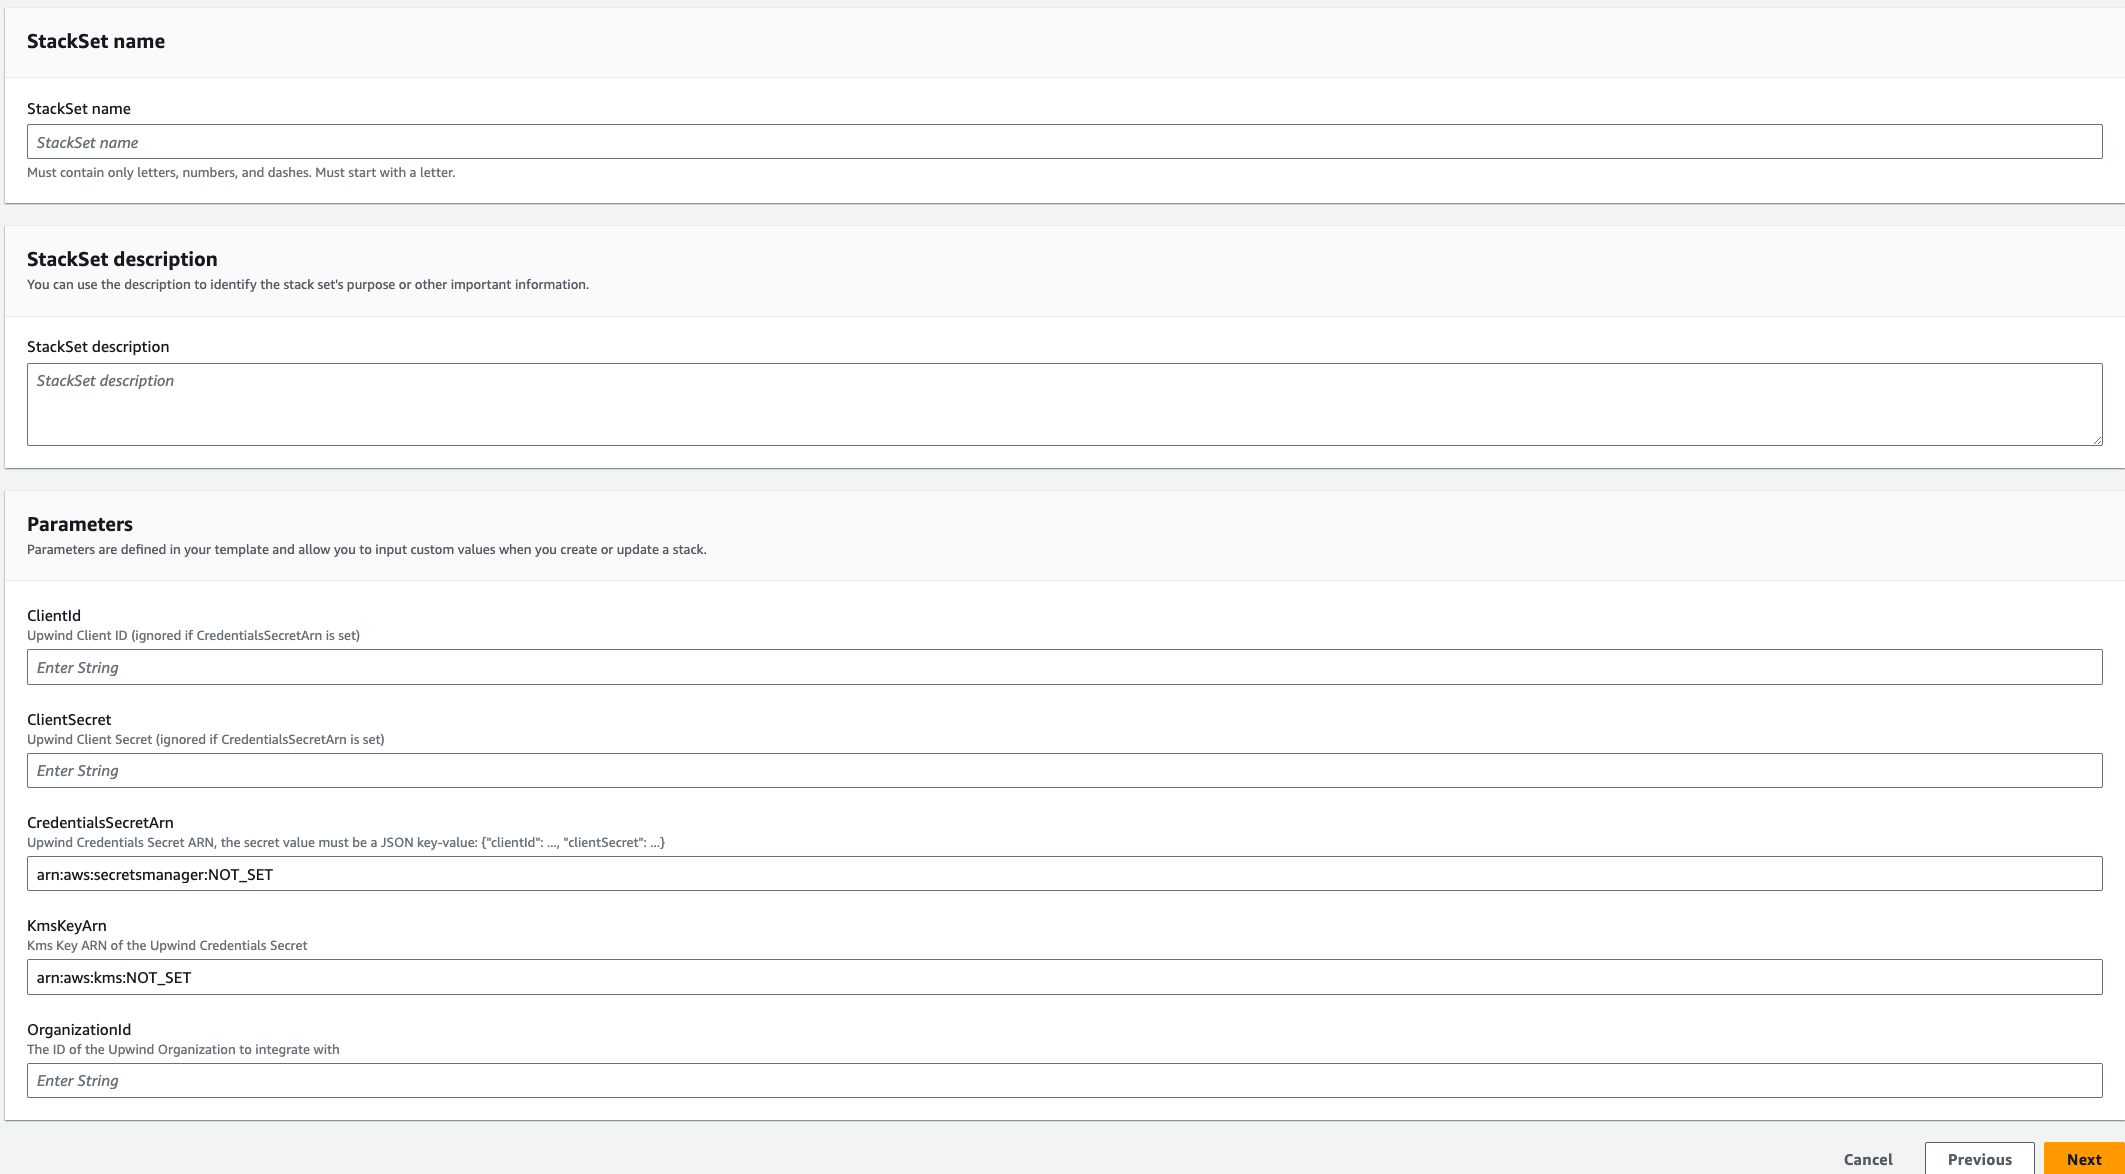
https://cfn.upwind.io.s3.amazonaws.com/onboarding/latest.yaml - In the "Specify StackSet details" section, enter the following parameters:
- StackSet name: Upwind-Integration
- ClientId: Upwind Client ID (ignored if CredentialsSecretArn is set)
- ClientSecret: Upwind Client Secret (ignored if CredentialsSecretArn is set)
- ClientSecretArn: Upwind Credentials Secret ARN, the secret value must be a JSON key-value:
{"clientId": ..., "clientSecret": ...} - KmsKeyId: Kms Key ARN of the Upwind Credentials Secret
- OrganizationId: The ID of the Upwind Organization to integrate with
- Click next, and continue to deploy across AWS accounts and regions.
If you need any assistance with the deployment, you can use AWS StackSet deployment documentation, or contact us at via the Live Chat.
Deploy the CloudFormation StackSet
Once you have completed the StackSet creation wizard, you need to wait for the StackSet deployment to complete. The StackSet deployment might take a couple of minutes depending on the number of accounts and regions you have selected.
Once the StackSet deployment is complete, you can go to the StackSet Instances and verify that the StackSet deployment was successful.
Verify Connectivity
Once the stack execution completed, the connection should be established. To confirm the connection, navigate to the My organization page and access the Cloud accounts tab. From there, simply search for the AWS account(s) by typing its ID(s). Once you locate the project, verify that the connection status is Connected.
Next Steps
After establishing a connection to your AWS account(s), Upwind will populate an inventory of all compute resources and show which resources are Unprotected.
To connect a Kubernetes cluster with Upwind, follow the instructions provided in the console: Connect a Kubernetes cluster or review
To connect a Linux host with Upwind, follow the instructions provided in the console: Connect a host.