Bring your own cloud (BYOC)
Overview
Upwind BYOC allows you to deploy Upwind outside of AWS, Google and Azure clouds, and get the manifest of runtime-powered CNAPP capabilities such as vulnerability management and advanced threat detection in your custom cloud provider (Oracle, IBM, etc) or on-premises data centers. This page will walk you through how to install Upwind in your own cloud or on-premises data center.
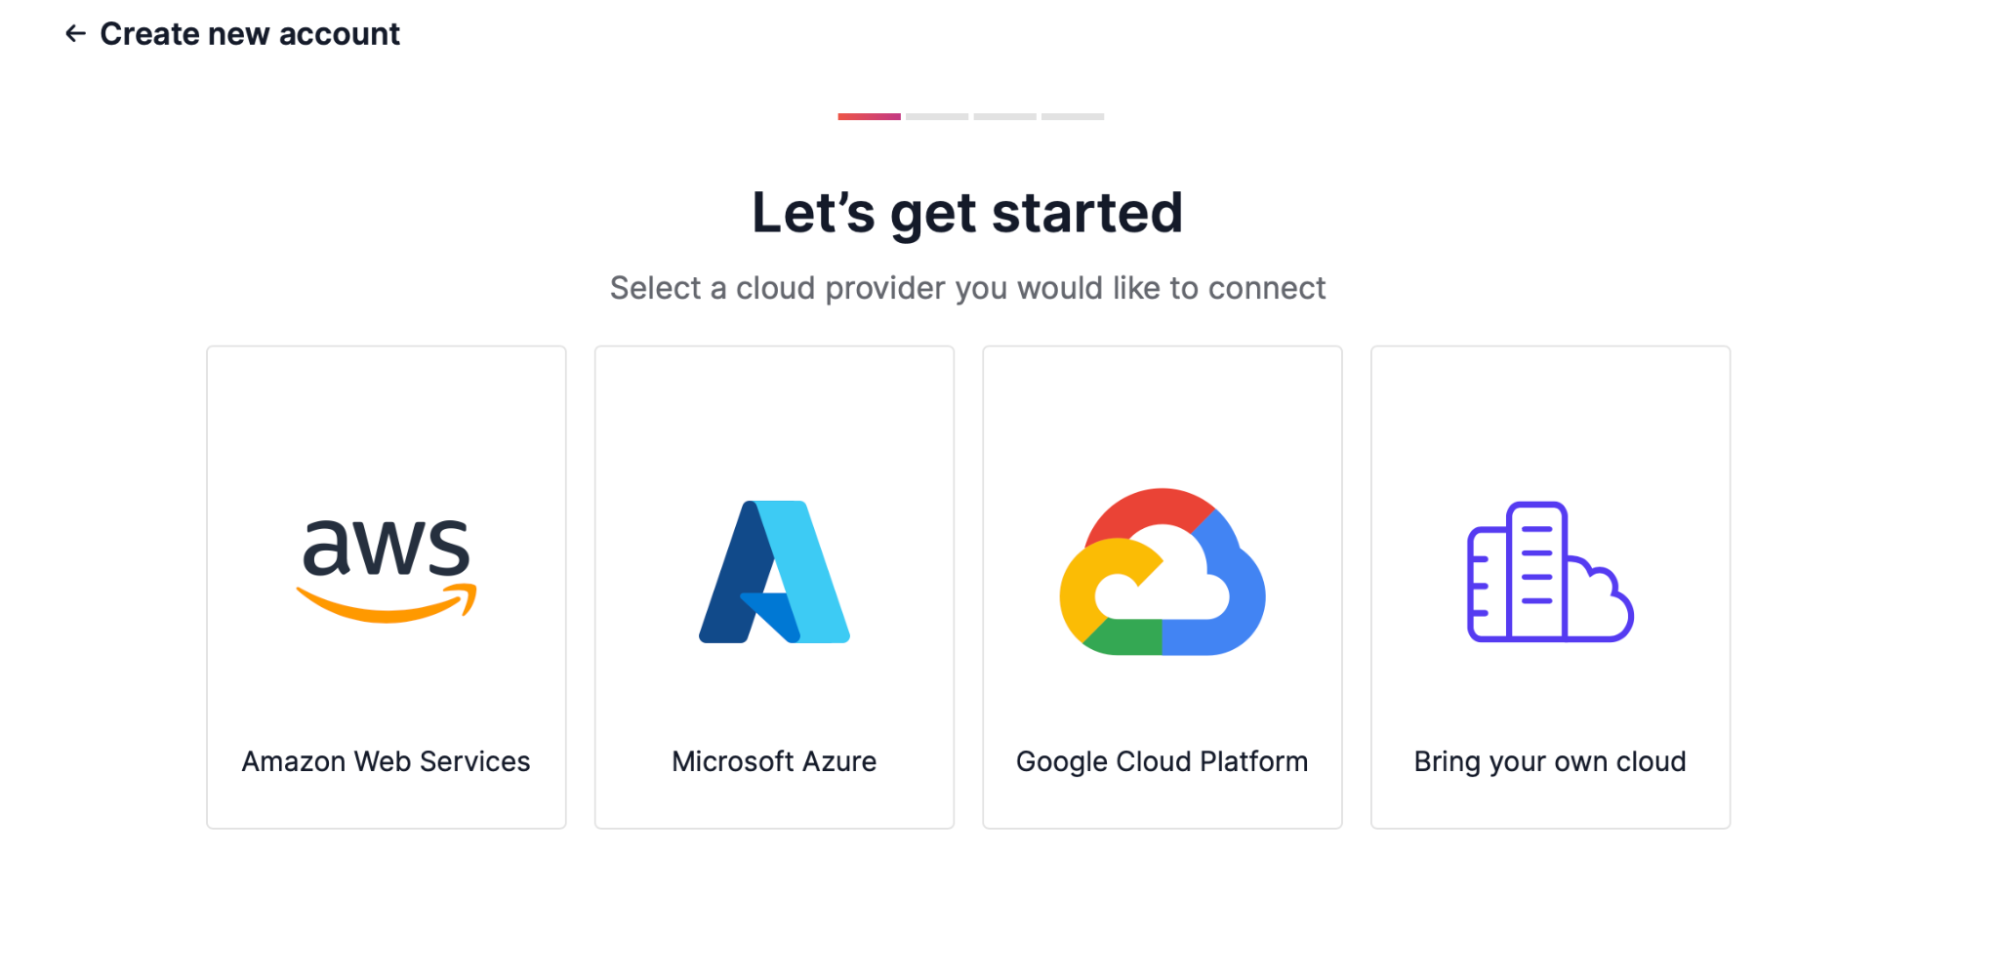
Start by navigating to My Organization → Cloud Accounts and click “Connect New Account.” You will then be directed to the following screen, where you will choose “Bring your own cloud.”
Connect to Your Data Center
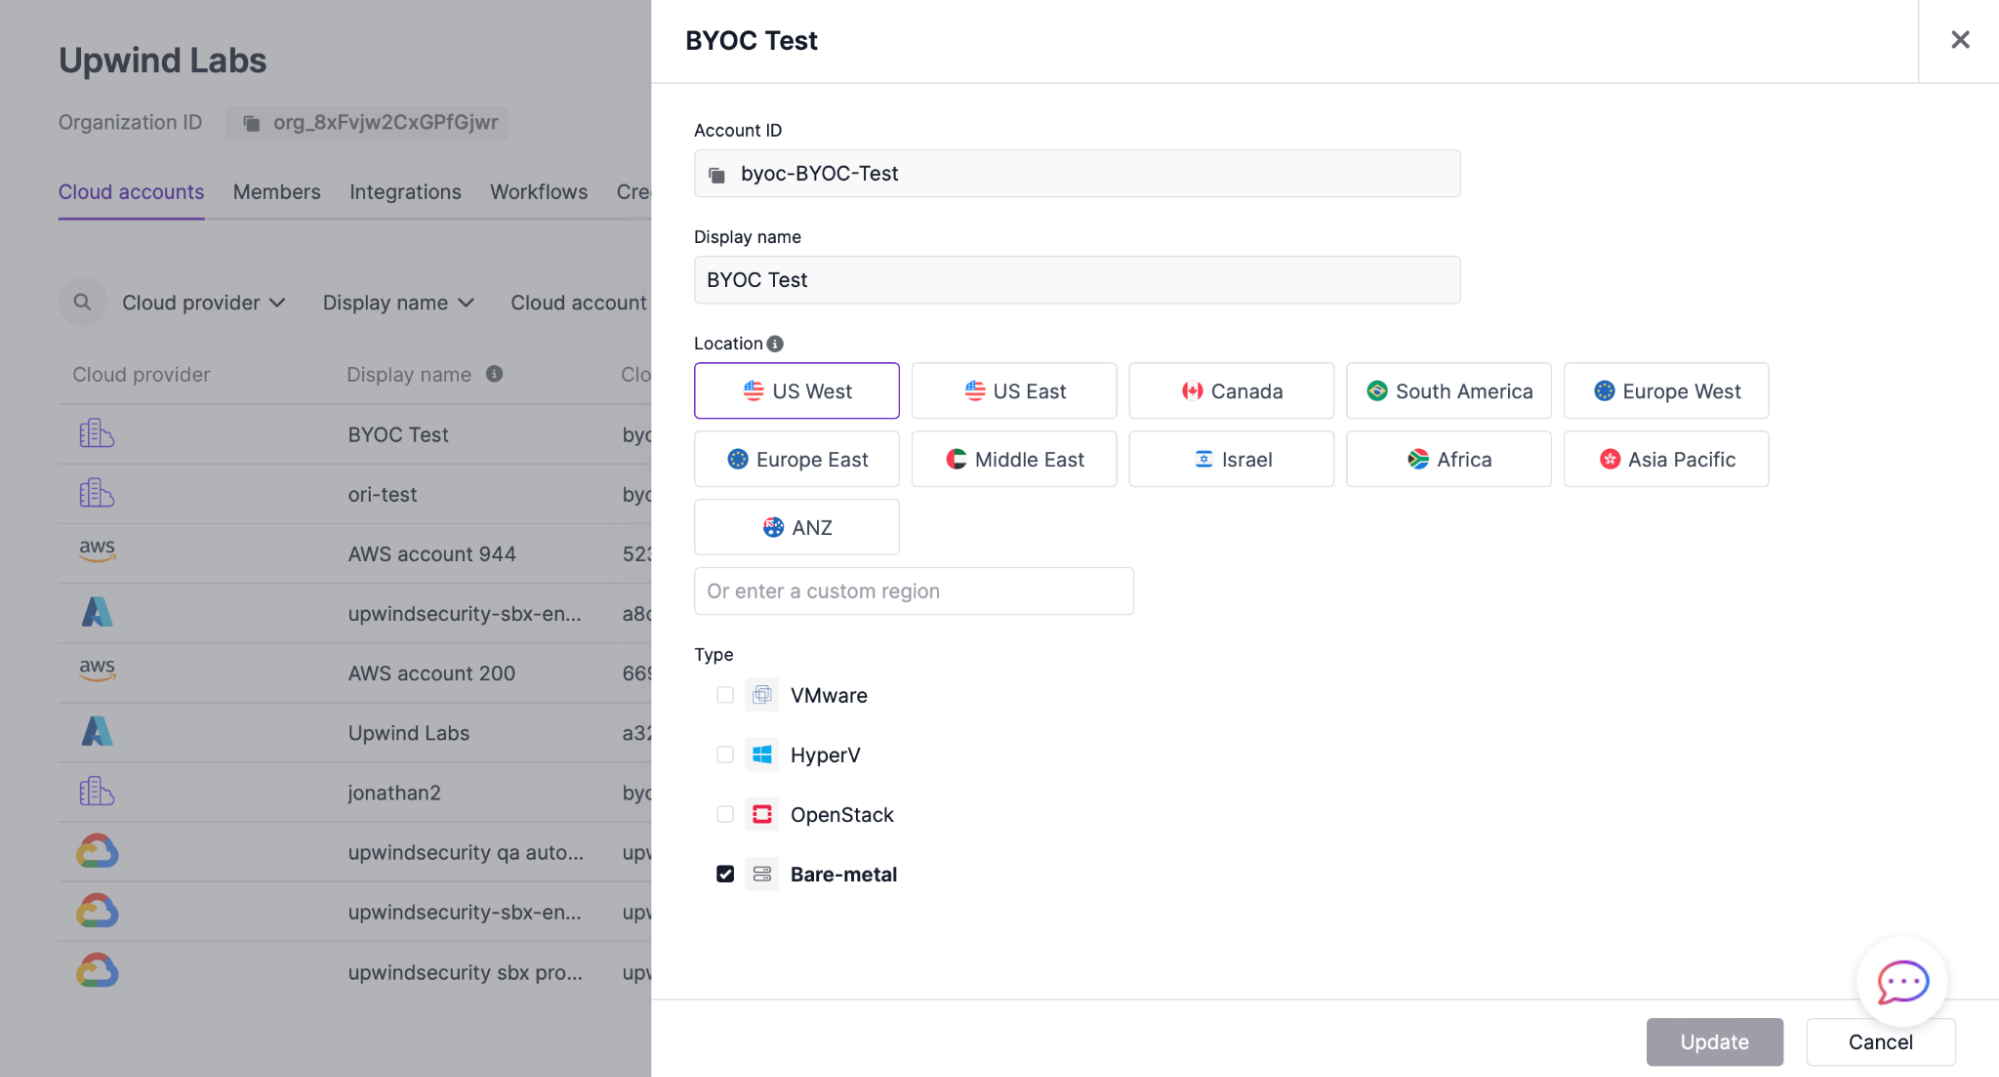
To connect to your data center, fill in the following information:
- Account ID: bring your own cloud
- Display name: choose a customized display name
- Location: choose the location of your data center from the list or fill in custom text
- Type: API type for additional enrichment to resources
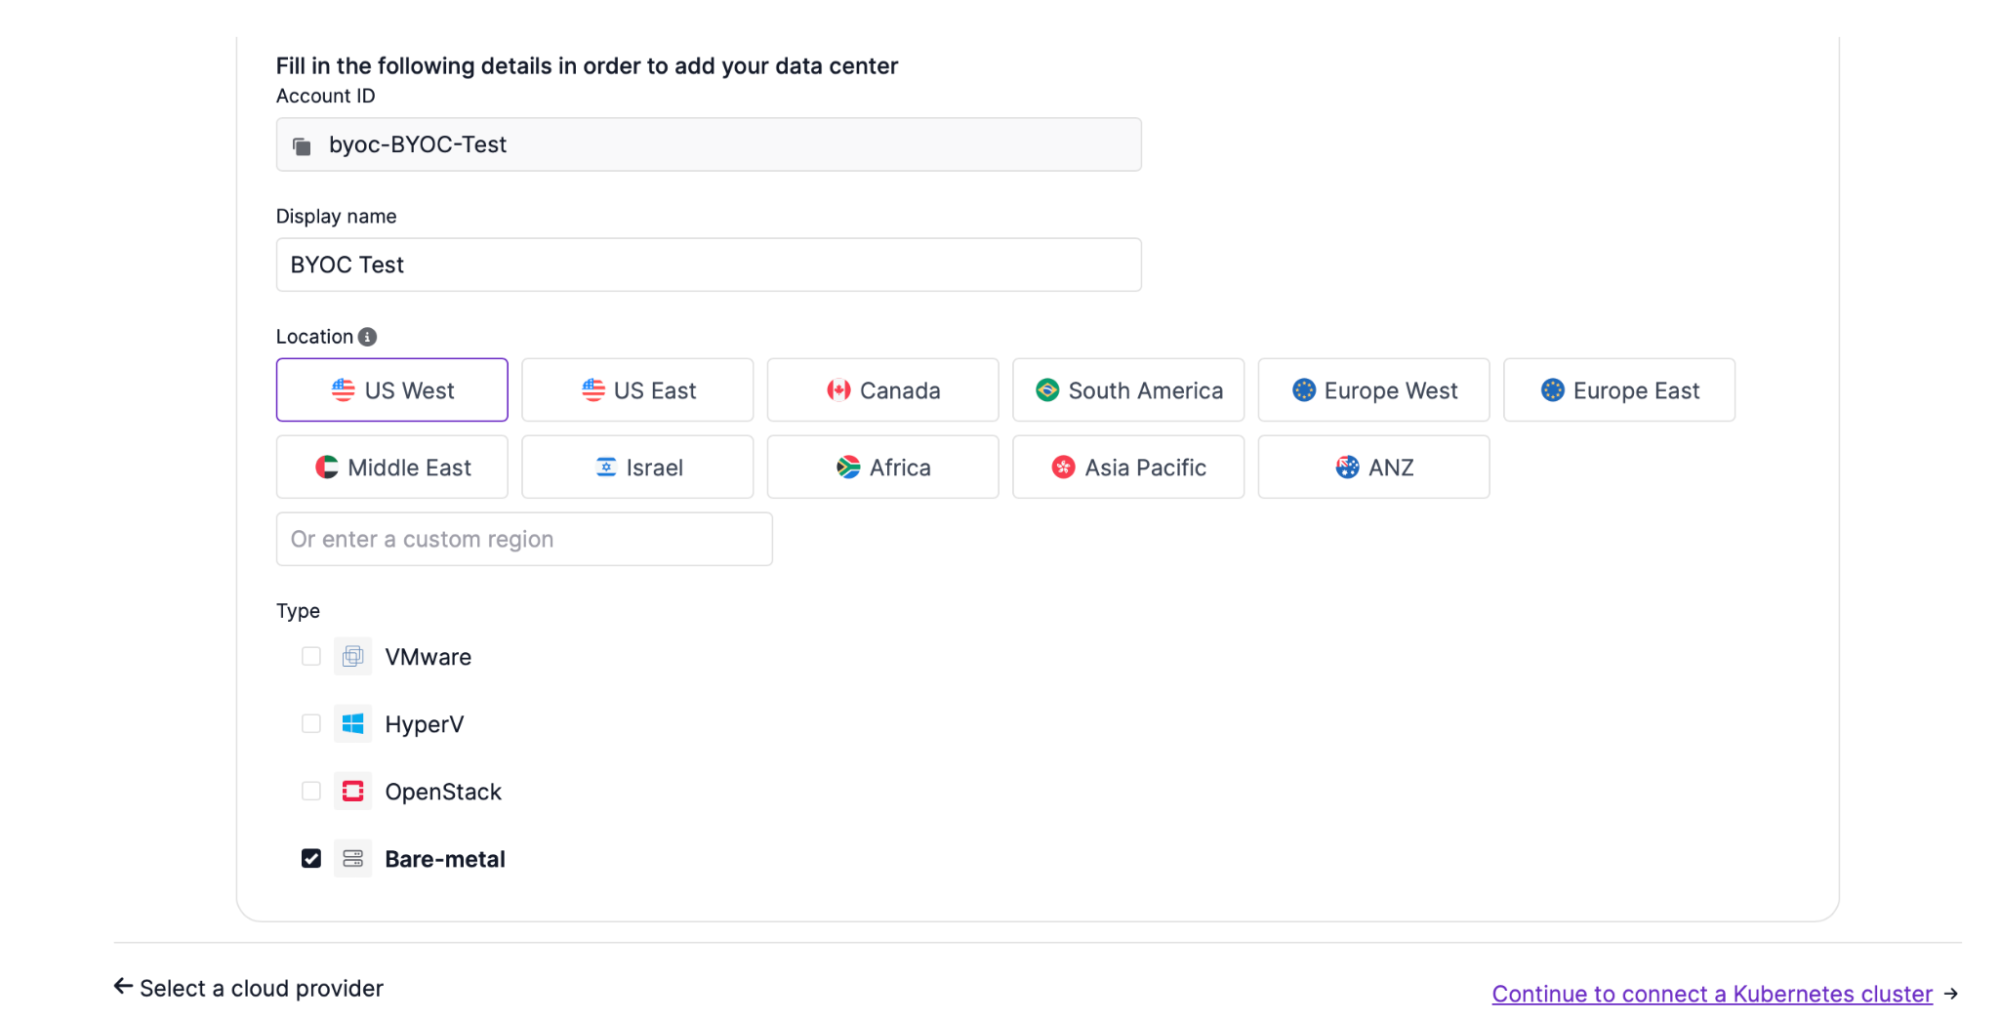
Upwind asks about location in order to provide a more friendly context related to your region. Upwind asks about type in order to get important infrastructure context from virtualization and management platforms such as VMware and HyperV. This allows Upwind to provide more accurate topology, visibility, detection and response.
Once you have filled out the required fields, click “Continue to connect a Kubernetes cluster.”
To get started, you can either deploy Upwind Operator for Kubernetes or Upwind Sensor for Virtual Machines.
Upwind Kubernetes Operator
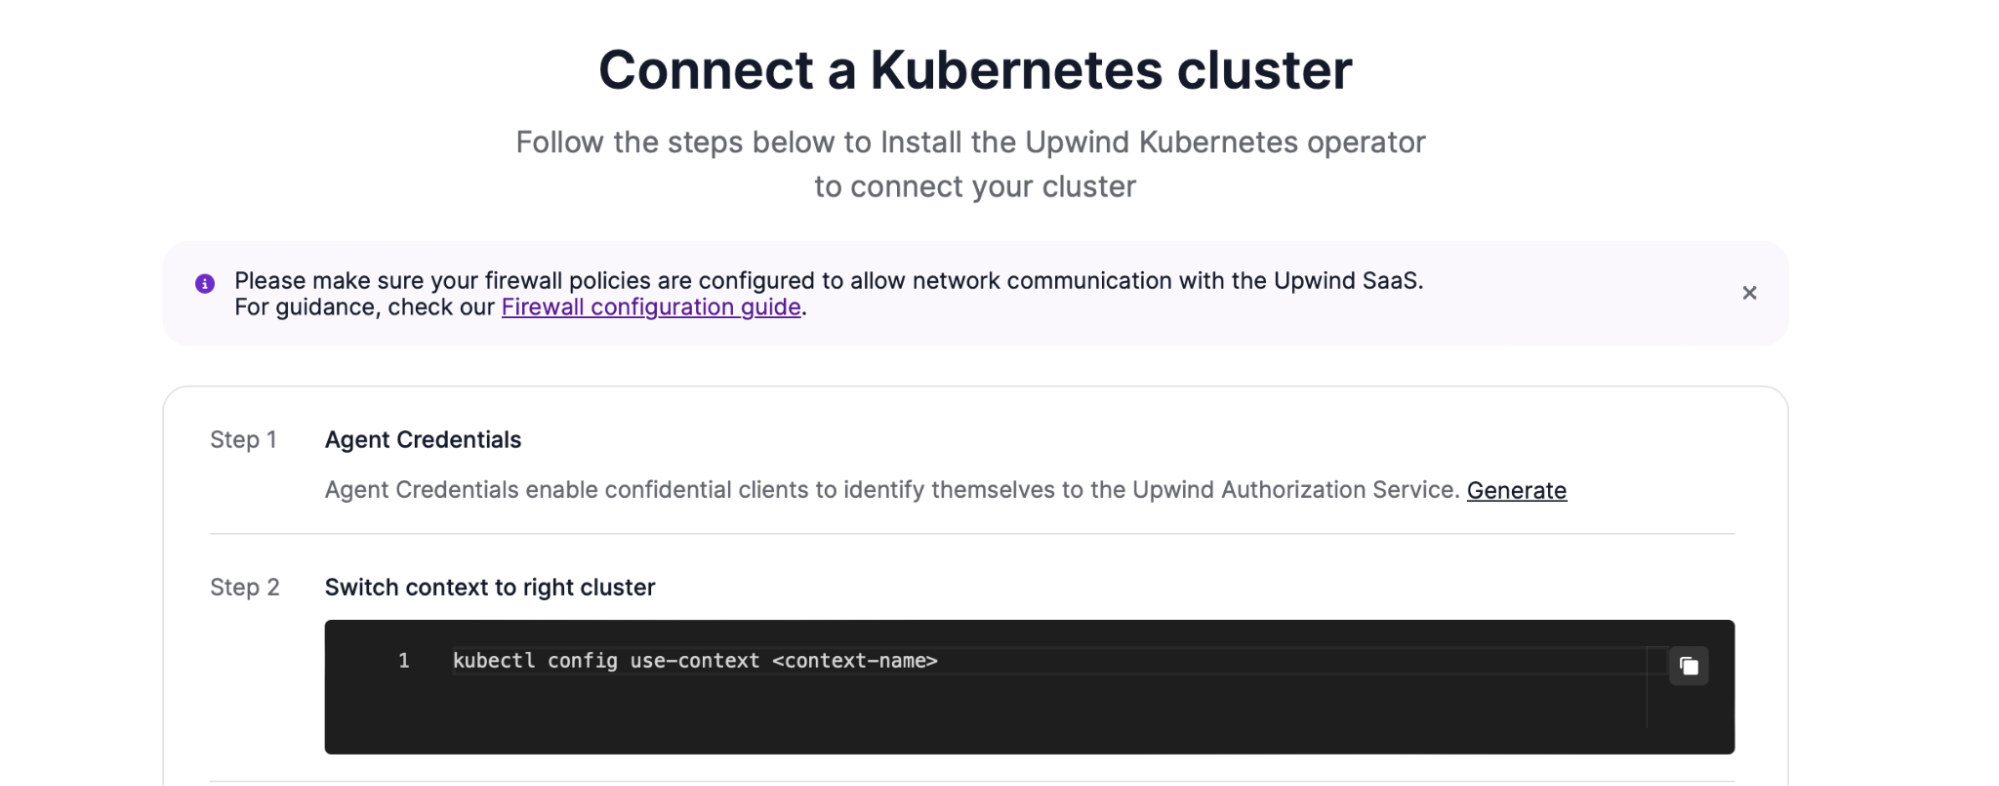
To connect a Kubernetes cluster with the Upwind Kubernetes operator, complete the following steps.
- Sensor Credentials: generate Sensor Credentials for the Upwind Authorization Service.
- Switch context to the right cluster: use the following code to direct context to the correct cluster
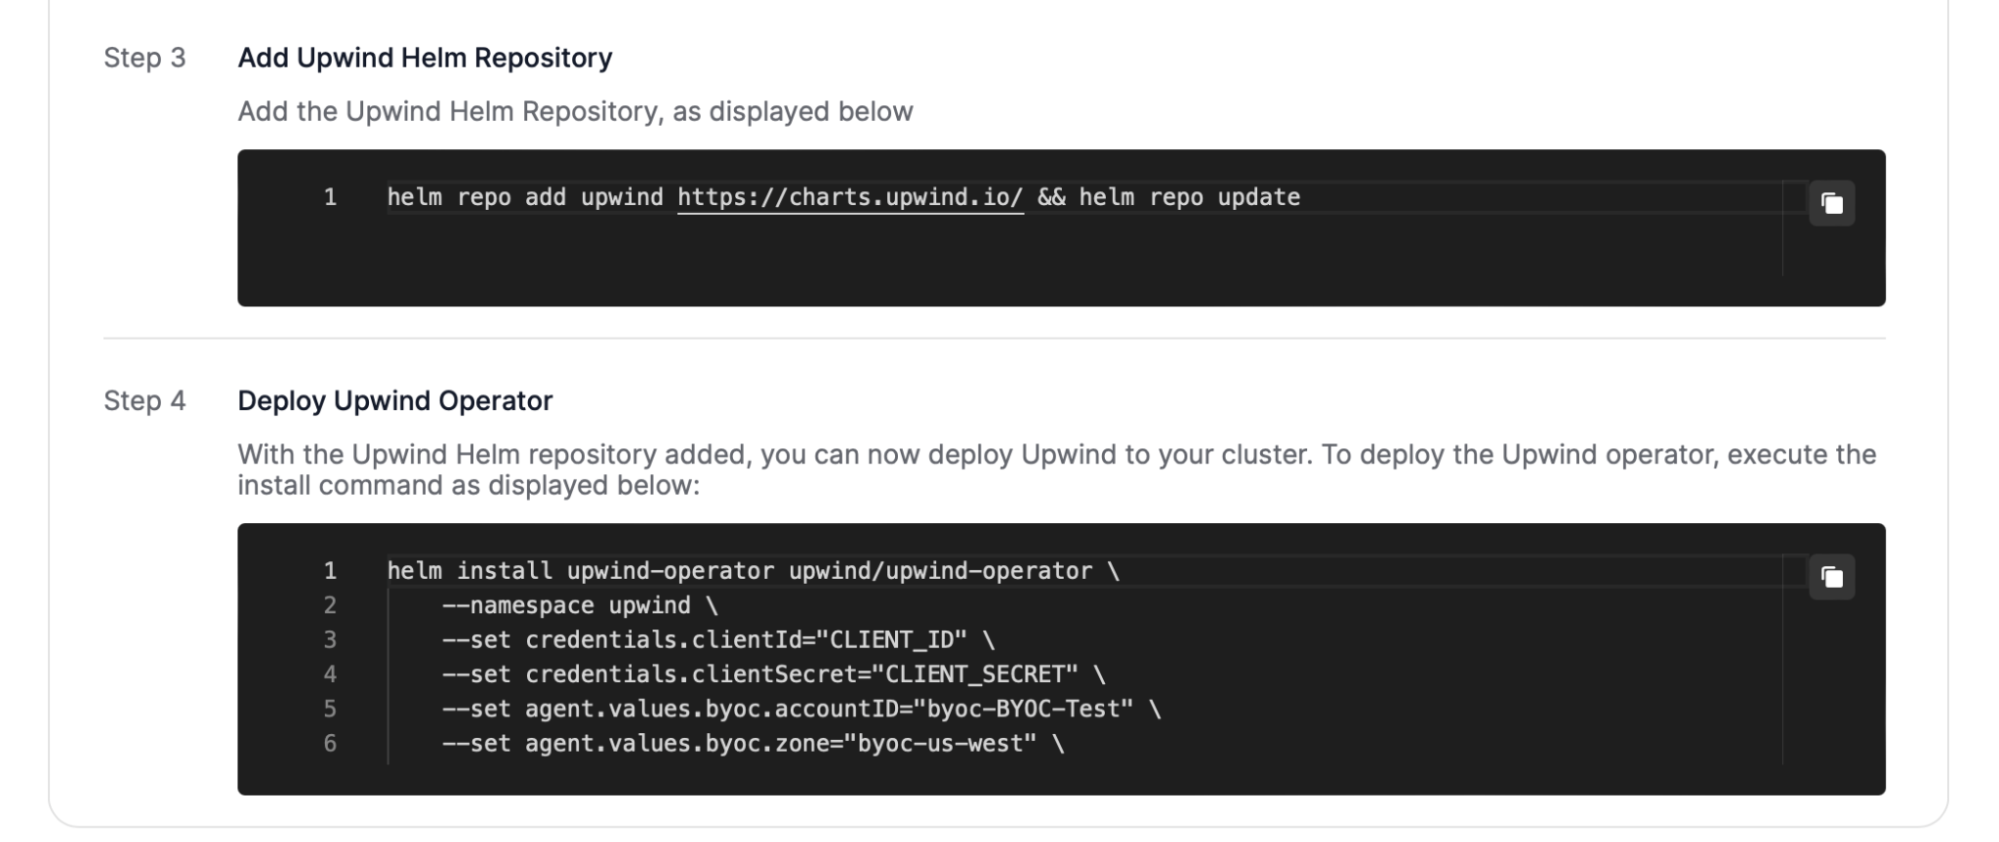
- Add Upwind Helm Repository: copy the code to add the Upwind Helm Repository
- Deploy Upwind Operator: deploy Upwind to your cluster with the Upwind Helm Repository by deploying the Upwind Operator.
When installing the Upwind Operator/Agent in a BYOC account, you must specify the flags:
--set agent.values.byoc.accountID=<YOUR-BYOC-ACCOUNT-NAME>
--set agent.values.byoc.zone=<YOUR-BYOC-ZONE>
--set clusterAgent.values.byoc.accountID=<YOUR-BYOC-ACCOUNT-NAME>
--set clusterAgent.values.byoc.zone=<YOUR-BYOC-ZONE>
--set extraEnv[0].name=CLOUD_PROVIDER,extraEnv[0].value=byoc --set extraEnv[1].name=CLOUD_ACCOUNT_ID,extraEnv[1].value=<YOUR-BYOC-ACCOUNT-NAME>
In order for the operator to authenticate with the correct BYOC Account.
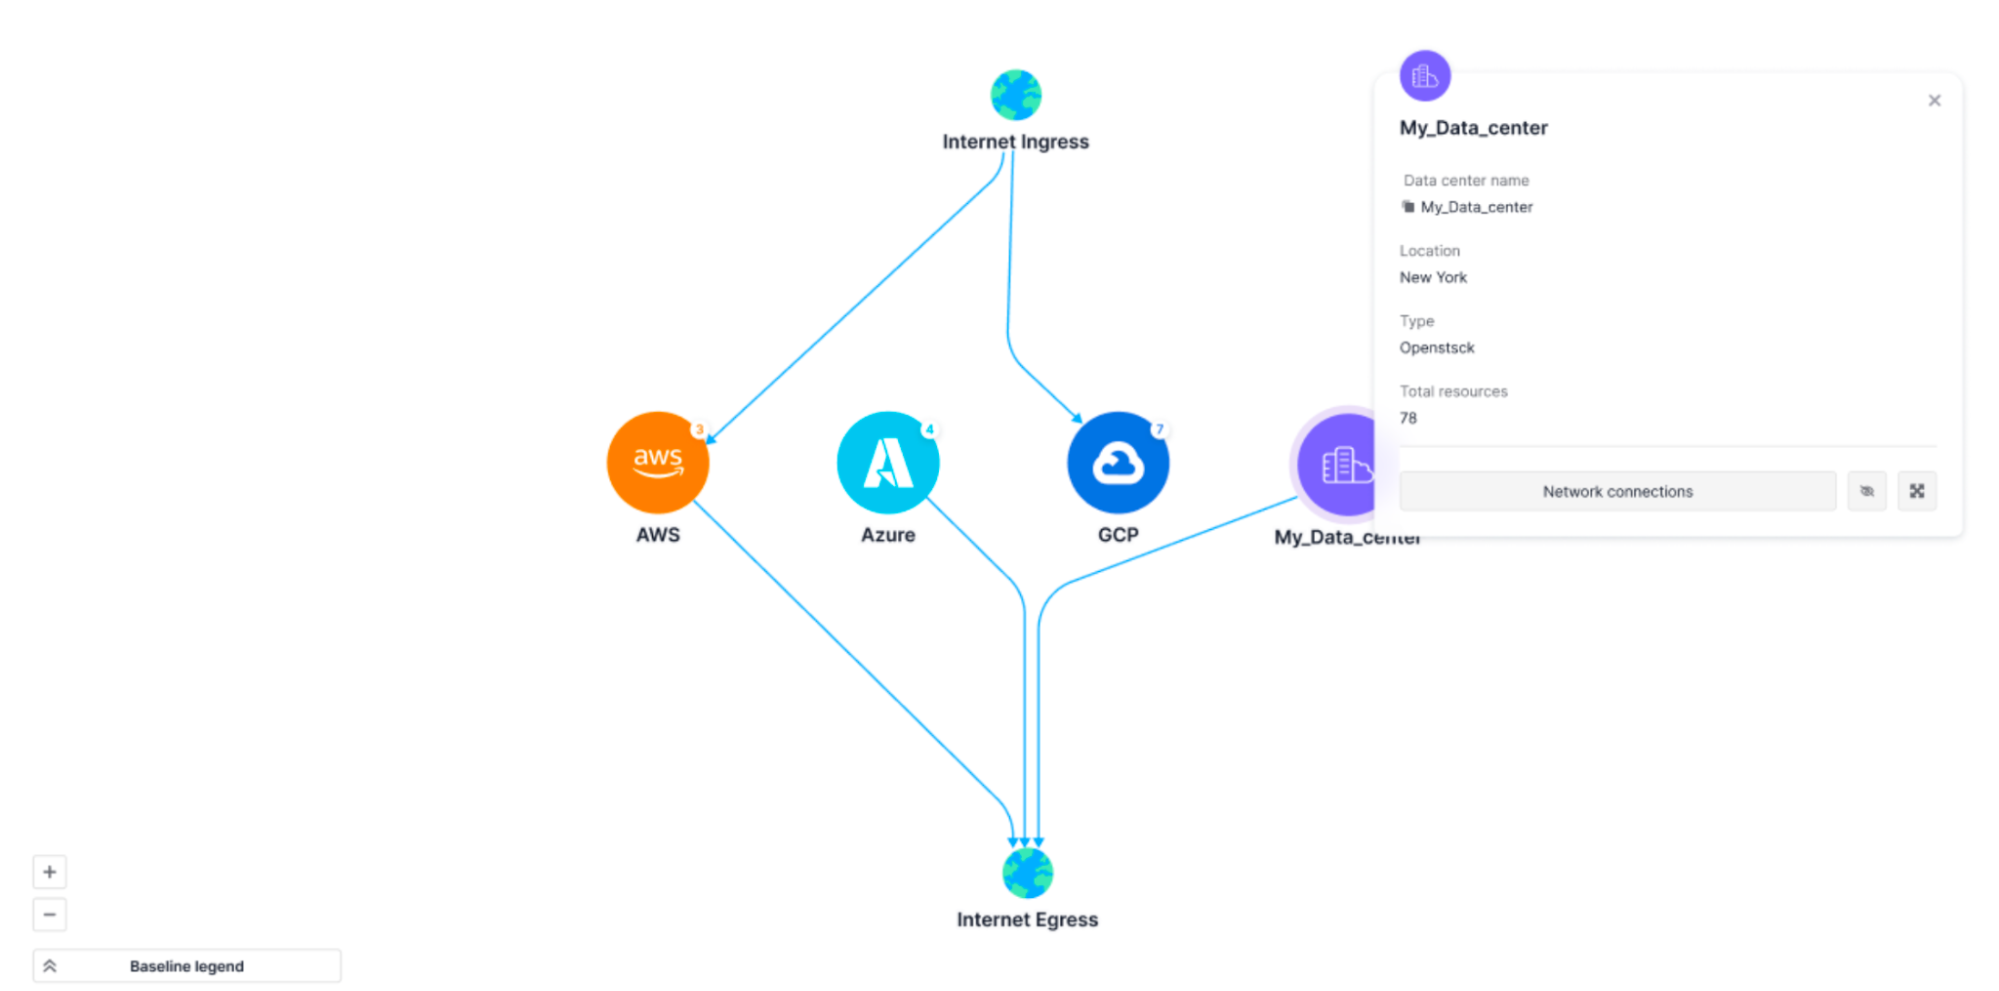
Once you have completed the above steps, you will be able to see your data center listed under the “Cloud accounts” tab in the Inventory module. To view information about the data center, click on the data center name.
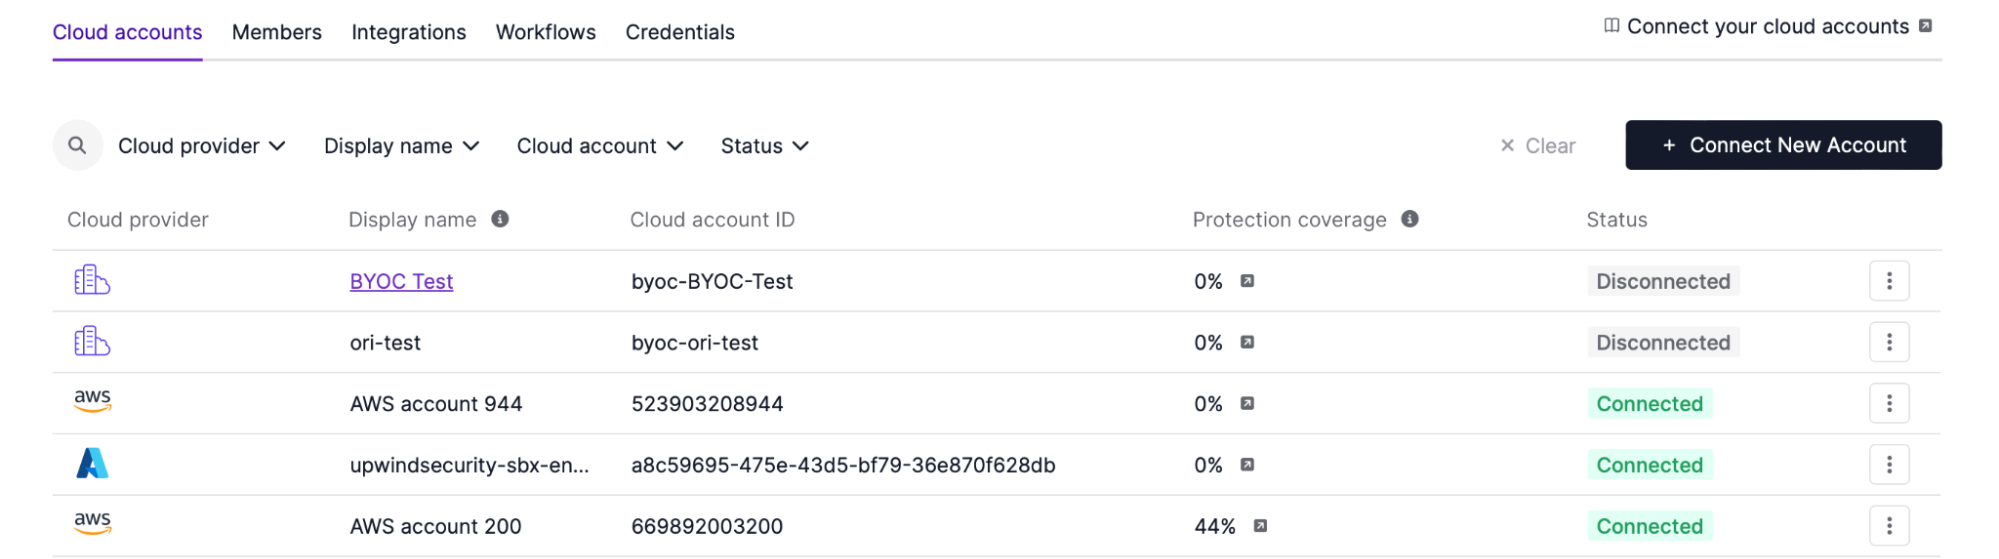
You will then see a side panel where you can view all of the data center information, edit information and update as needed.
Once completed, you will then see it in your connected accounts in inventory and be able to see your data center in the topology map with all of your connected kubernetes clusters.
View Data Center in Upwind’s Topology Map
To view your data center in Upwind’s Topology Map, go to the Map Module. There, you will immediately see any connected cloud accounts, as well as your data center.
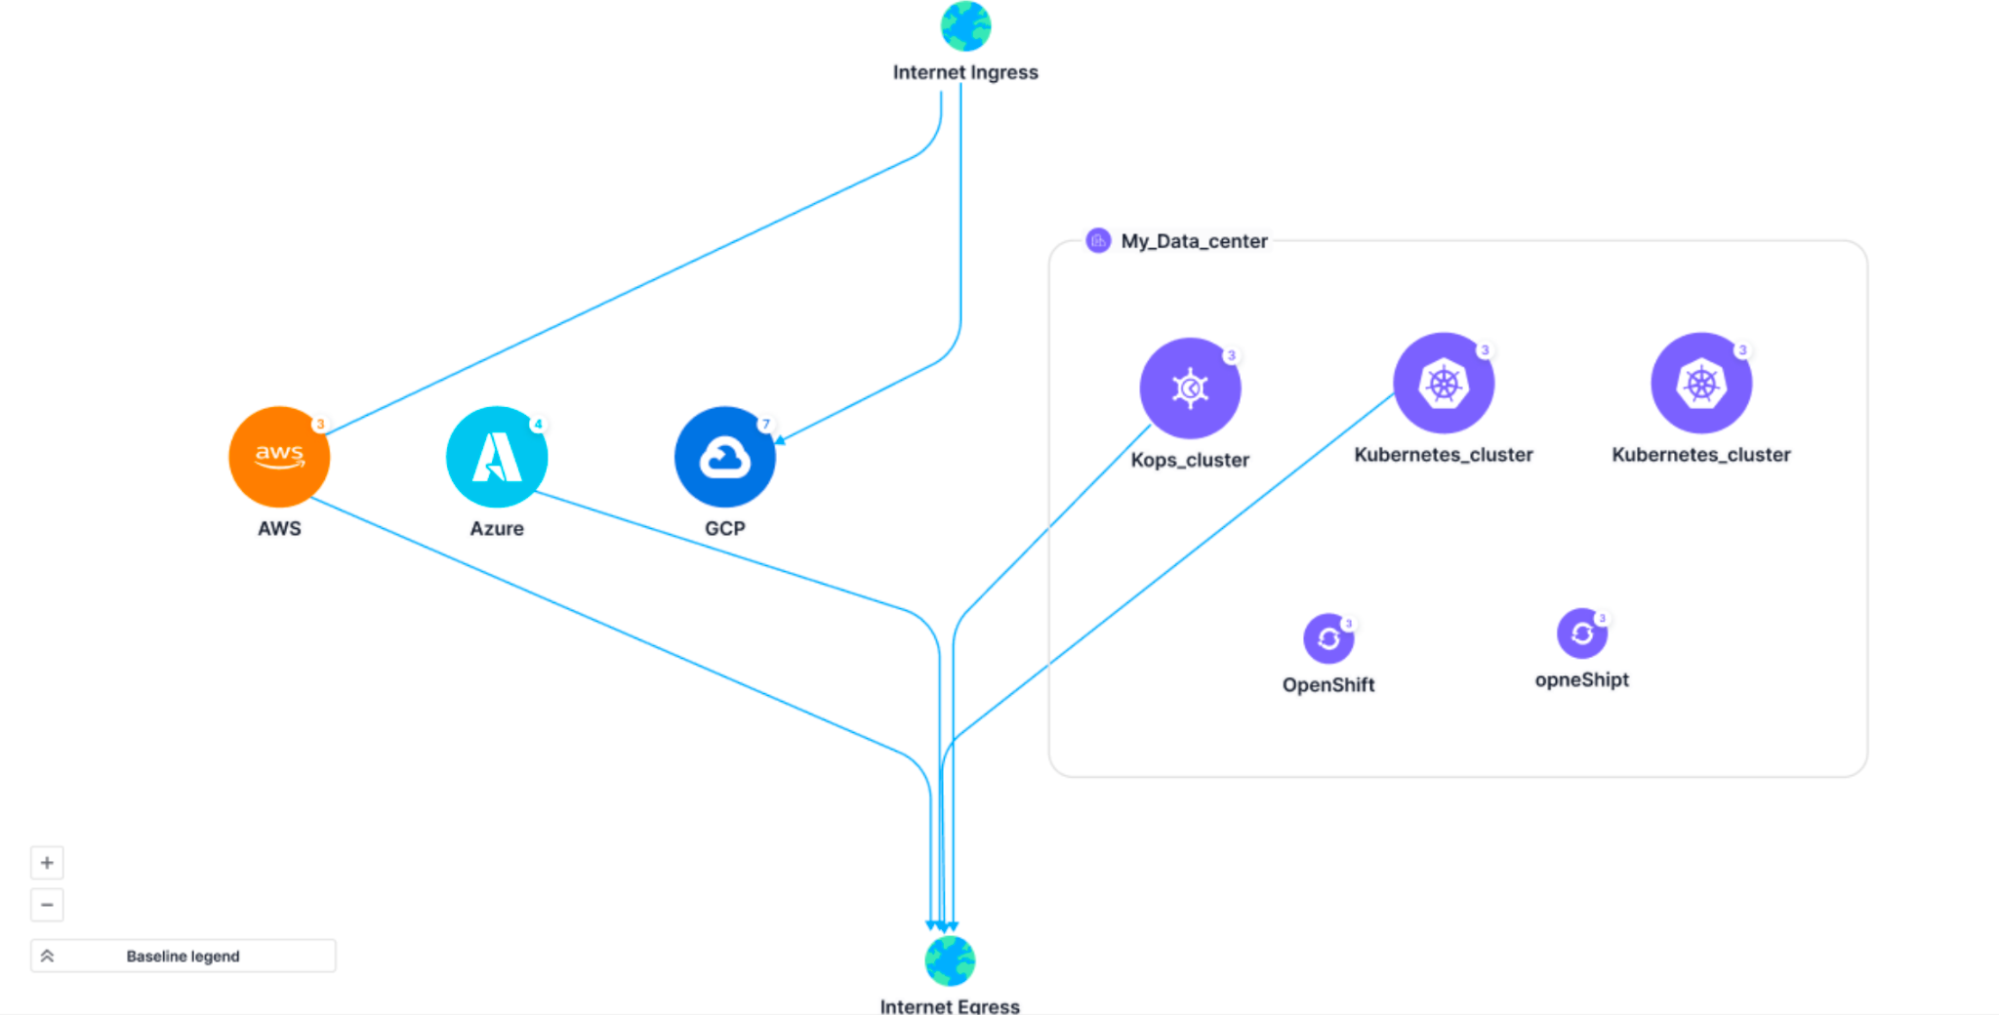
If you click on the data center to drill down further, you will also see your data center’s Kubernetes clusters and any Internet communication.