Connect an Azure subscription manually
Overview
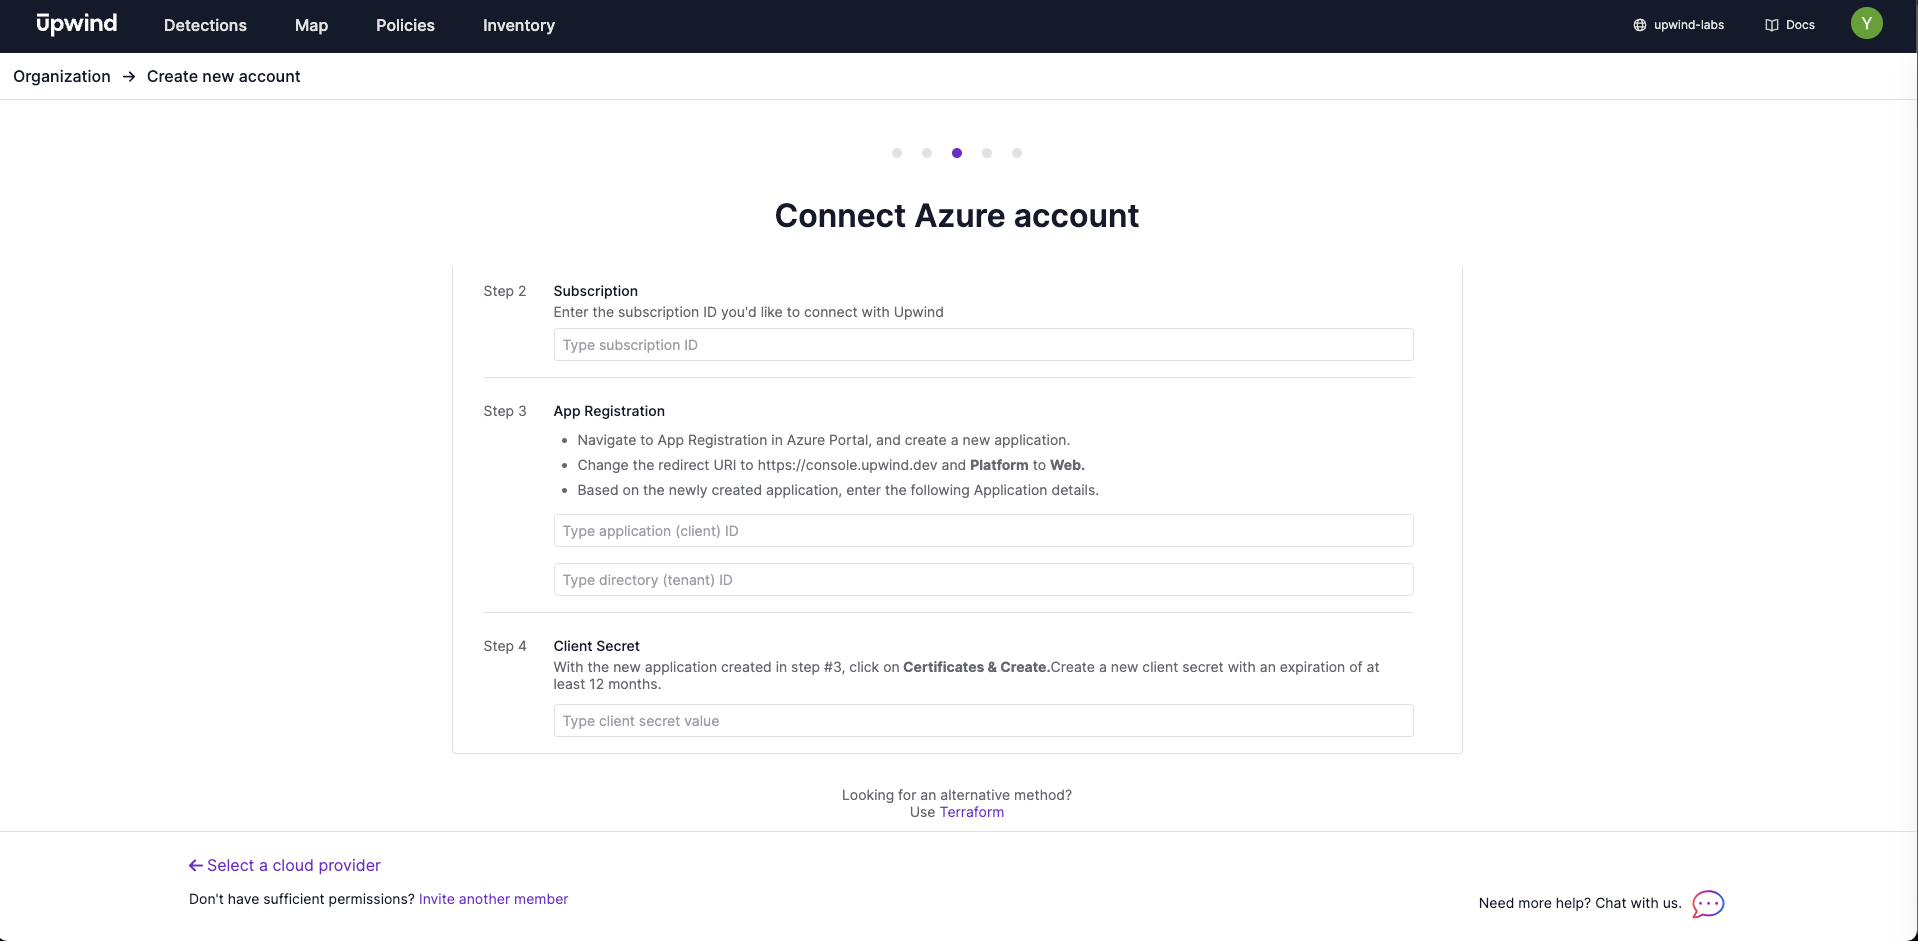
The following is a step-by-step guide on how to connect your Azure subscriptions to Upwind platform manually. This page outlines the necessary steps to connect your Azure subscription to Upwind. The process comprises the following steps:
- Create app registration.
- Create service principal.
- Create Role definition for the Upwind permissions in the Azure subscription.
- Create a Role assignment for the Upwind permissions in the Azure subscription.
- Enter the credentials of the service principal, subscription id, tenant id and app registration in the Upwind console.
- Verify that the connection is successful.
Prerequisites
To connect your Azure subscription to Upwind, you need to have the following access:
- Owner permissions role assigned to the Azure subscription you want to connect.
- Permissions to create App Registration & Service Principal (if you have Azure AD administrator role, this will be sufficient).
Setup
Step 1: Create App Registration
- Log into Azure Portal
In the search bar, type App Registration and click the App Registration item.
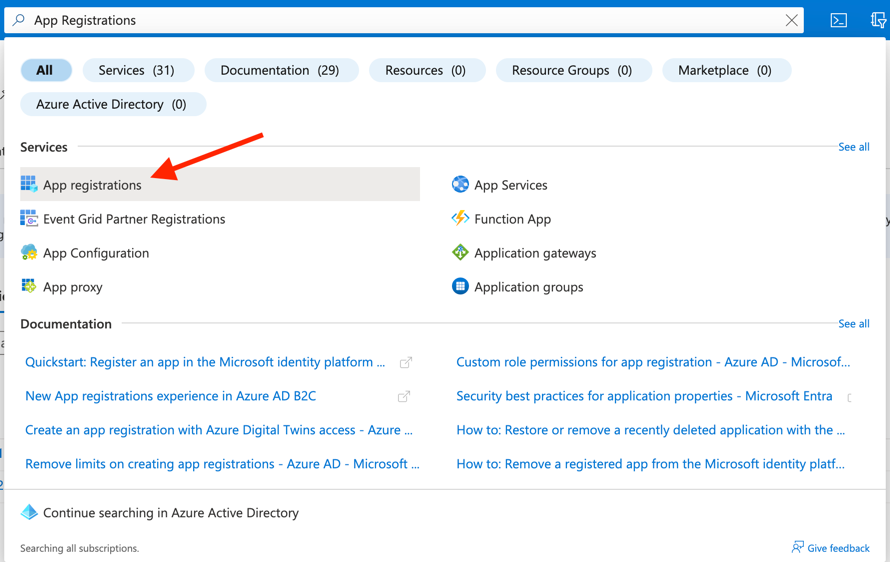
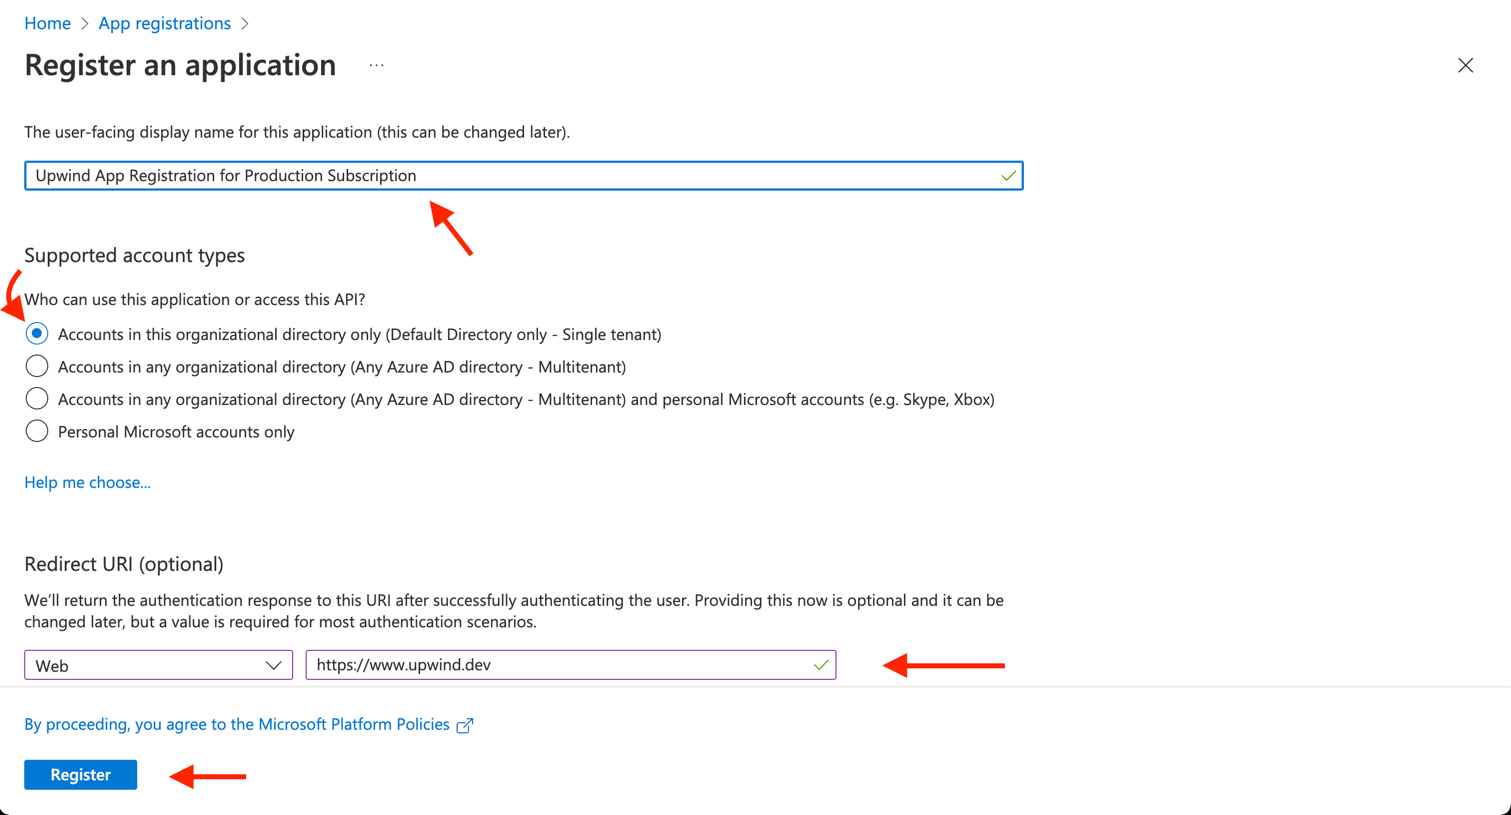
- Click + New registration and fill in the following fields:
- Name:
upwindsecurity-<your-azure-subscription-name> - Supported account types: Accounts in this organizational directory only (Default Directory only - Single tenant)
- Redirect URIs:
- Platform: Web
- URI: https://www.upwind.io
- Name:
- Click Register
Now you have successfully created an app registration.
- Application (client) ID field, and paste it into Application (client) ID
- Directory (tenant) ID field, and paste it into Tenant ID
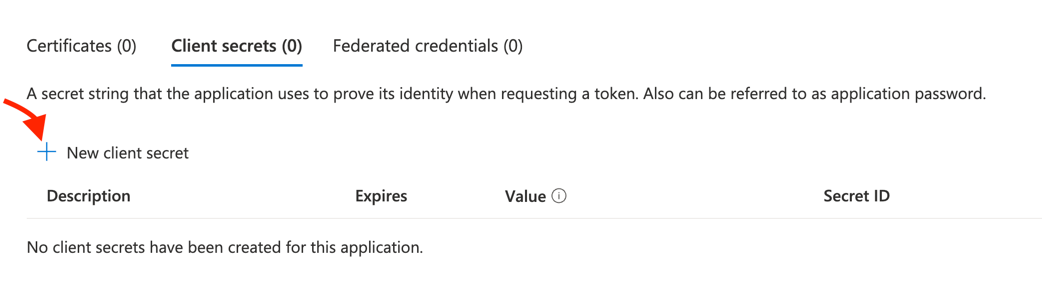
Step 2: Create Service Principal
In this step, you will create the service principal and secret to allow Upwind a secure connection to your Azure subscription.
- In the App Registration page that you created, click Certificate & secrets.
- Click + New client secret and fill in the following fields:
- Description: Brief description of the client secret.
- Expires: Recommended value is 1 year.
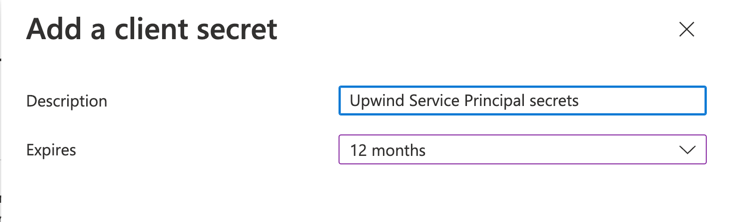
Please Copy the secret value, as it will disappear, and you will need it to complete the subscription connection in the Upwind console.
Step 3: Grant Permissions to the App Registration
In this section, you will be asked to grant the application permissions to the Azure subscription by adding a Role assignment. Attachment of the Role definition to the app registration, means that Upwind will be able to access the resources in the Azure subscription it is scoped to.
There are two types of permissions that you can grant to the application:
- Read Only: This grants Upwind permissions to read all resources in the Azure subscription.
- Enforce: This grants Upwind extended capabilities, to perform operations such as creating, updating, and deleting resources in the Azure subscription.
Add Role Assignment
- From the Access control (IAM) page, for the specific subscription click Role assignments.
- Click + Add and select Add role assignment.
- Select the built-in role Reader.
- In the Members section, Click + Select members and select the app registration you created in Step #1.
- Click Review + assign to finish the process.
You have successfully assigned the role to the App Registration.
There is a common issue that you might encounter in this step, which is that the App Registration you created in Step #1 is not listed in the Members section. If this is the case, you will need to wait for a few minutes and try again, or you can pull the App Registration from Azure CLI:
- Open the Azure CLI.
- Run the following command:
az ad sp list --display-name "{your-upwind-app-registration-name}"
- Copy the appId value.
- Run the following command, to create the Azure role assignment:
az role assignment create --role "Reader" --assignee "{your-object-id}" --scope "/subscriptions/{your-subscription-id}"
Step 4: complete the subscription connection in the Upwind console
Now that all the prerequisites are done, you can complete the subscription connection in the Upwind console.
- In the Application id field, paste the Application (client) ID you copied in Step #1.
- In the Tenant id field, paste the Directory (tenant) ID you copied in Step #1.
- In the Secret field, paste the secret value you copied in Step #2.
- In the Subscription id field, paste the Subscription ID you copied in Step #1.
- Click Connect.
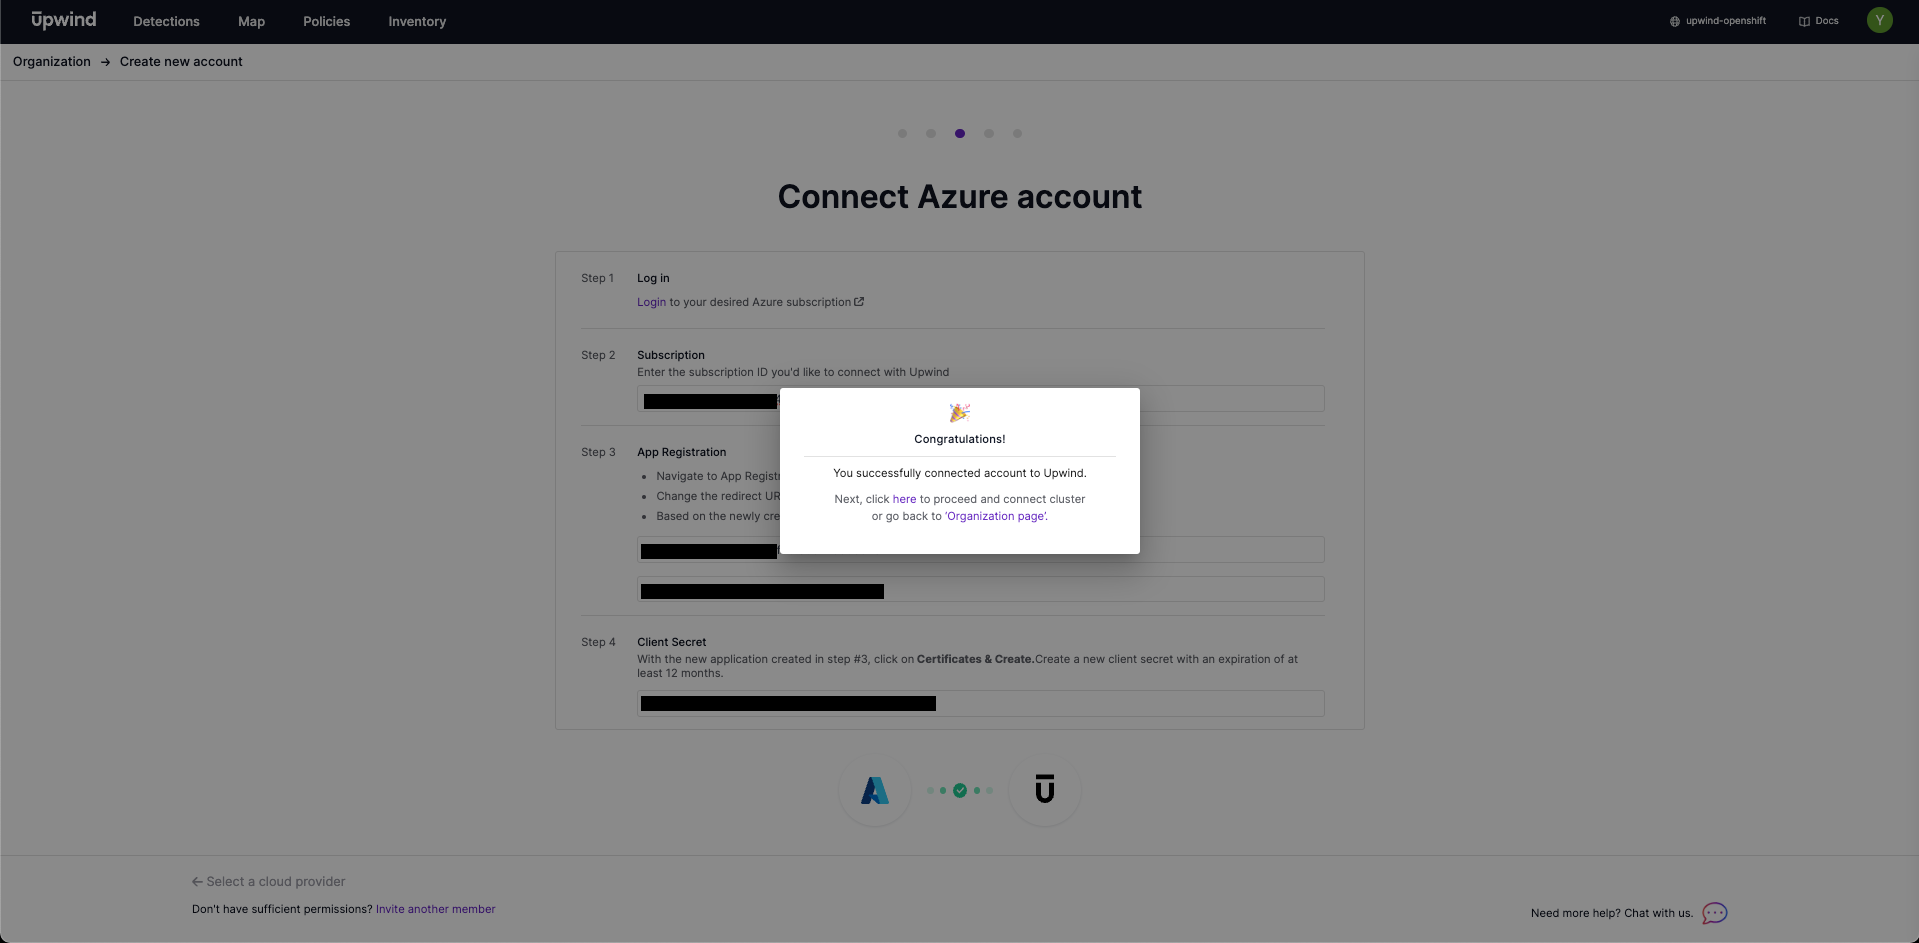
Step 5: Verify that the connection is successful
Now that you have successfully connected your Azure subscription to Upwind, you can verify that the connection is successful.
If the connection is successful, you will see the following message displayed:
Troubleshooting
If you encounter any issues in the process of connecting your Azure subscriptions to Upwind, please contact our support team at support@upwind.io.
Next Steps
After establishing a connection to your Azure subscription(s), Upwind will populate an inventory of all compute resources and show which resources are Unprotected.
To connect a Kubernetes cluster with Upwind, follow the instructions provided in the console: Connect a Kubernetes cluster or review
To connect a Linux host with Upwind, follow the instructions provided in the console: Connect a host.